
With the advent of a new year comes the anticipated list of resolutions – mainly along the lines of eating less, doing more exercise, or curtailing a particular vice. Therefore, I commend to you a new year’s resolution that doesn’t involve giving up something you enjoy. More importantly I hope that after reading this article, you will have been convinced of the relative merits of becoming self–sufficient in this area. For this post I am looking into the humble origins of ‘our daily bread’, ‘the staff of life’ – stop sniggering at the back Perkins!
This is not just any bread – I want to talk about sourdough. When I announced to my esteemed Nosey Chef colleague Nigel, that I was growing a sourdough starter, he mockingly asked if I was also growing a scrappy goatee beard and considering moving to a roadside caravan, with a set of bongo drums and a woolly hat, to eke out a living making phallic-shaped wood carvings with a two-stroke chainsaw. Hmm … let me think about that Nige, and I’ll get back to you when I have a second-hand Elddis van and enough propane to cook on.
While I might not be making any such drastic changes to my lifestyle in the near future, I have completely changed my approach towards bread. This staple of human sustenance has been a part of our diet for thousands of years – long before it was bastardised and thrust into a plastic bag to sweat on aluminium supermarket shelves. The bread I am interested in does not contain anything artificial – even the yeast is plucked, quite literally, out of the air.
History tells us that humans have been eating wild grains and cereal for over 20,000 years. In about 9,500BC, we discovered that, if you crush the grains between two stones, you remove the tough husk and get to the business bit in the middle. This nugget could then be mixed with water to form a gruel, which, when left to dry, formed a primitive bread-like crust. It was probably in one such bowl of shit-awful gruel that some airborne yeast settled, and the leavening process was discovered.
The rest of the story really just follows the natural course of evolution in which we improve, refine and develop something, up the the point that it is so overly engineered and artificial that we actually destroy it and end up with a product so far removed from the original as to be virtually unrecognisable (e.g. Chorleywood bread). Then, at some point in the future, we think ‘wouldn’t it be good to go back and look at how this used to be done.’ How very Nosey Chef! Enter, the artisan baker, his hat that looks like a sock, and all of Nige’s preconceived stereotypes of sourbread bakers.

Possible sourbread baker
At the same time I started to develop an interest in cooking, and purchased a copy of Larousse, I also bought the other book that shaped how I viewed food – not just the cooking and the eating, but its origins and production. That book was Hugh Fearnley-Whittingstall’s River Cottage Cookbook. This was more than just a book full of recipes and colourful pictures – it was a portal into a new world for me: a world that used seasonal produce, and a world where no part of an animal was wasted, and where simple ingredients were used to produce food that could be complex without being complicated.

Hugh Fearnley-Whittingstall, the modern father of self sufficiency.
It is Whittingstall’s method that I followed to make my first dough starter, and his method that I followed to make another one after the original was lost on moving house. Importantly, while I may adapt and add strange ingredients like charcoal, or use rye flour instead of white or wholemeal, the basic recipe that I follow every week I make bread, is that of Whittingstall.’ Why? Well, because it works.
Be under no illusion that sourdough baking is something that can be achieved quickly. It takes time and requires a completely different approach to that required for baking bread using conventional yeast. However, try it, and I’m sure that you will be so pleased with the results that you will want to come back for more. Then, perhaps, you may even start to feel like a true ‘artisan’, with or without the facial hair.
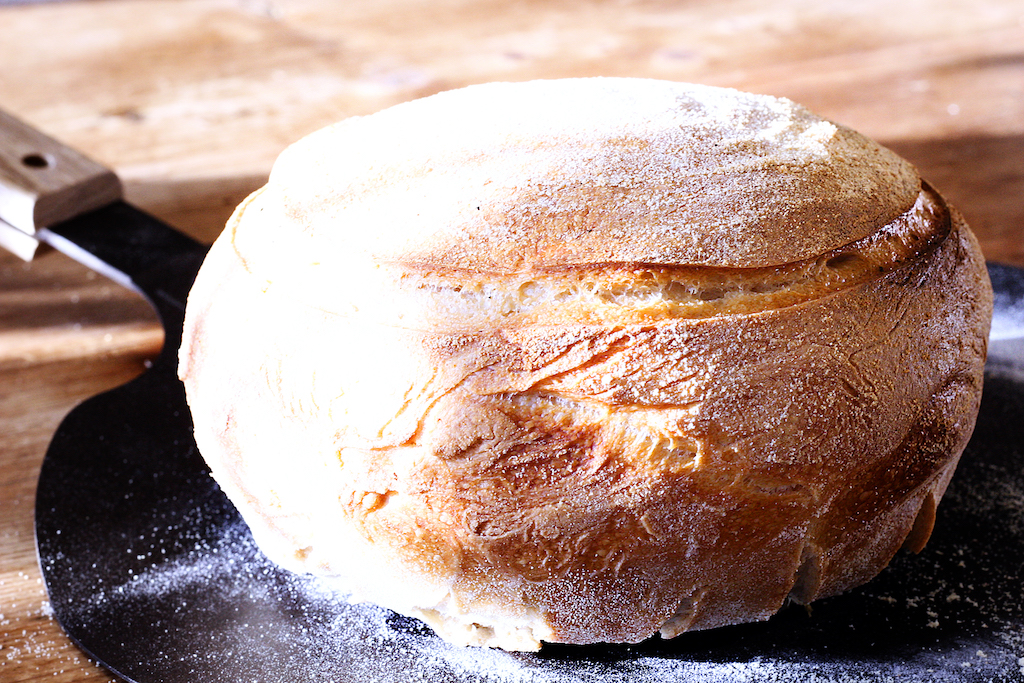
Sourdough bread #1
 (No Ratings Yet)
Ingredients
- For the sourdough starter:
- 100g strong bread flour
- Lukewarm water
- Enough strong bread flour to feed the starter
- For the sponge:
- 250g flour
- 275ml warm water
- For the loaf:
- 300g flour (white, wholemeal or rye)
- 10g sea salt
- A slug of olive oil
Instructions
To make the sourdough starter, mix the flour with enough water to form a batter, the consistency of thick paint. Cover with clingfilm and leave in a warm place; airing cupboard or a warm cupboard. The appearance of small bubbles on the surface signals that fermentation has begun. This is the point at which you have to start feeding your starter.
To feed, add 100g of flour with enough water (you can use cold from the tap now) to maintain a thick paint-like consistency. The starter can now be kept at room temperature. Every 24 hours discard half of the mixture, add 100g of flour, with enough water to maintain the original consistency. At first, it will smell somewhat acrid, but over the course of about 10 days it will mellow. You will know when it is ready, as the aroma will change to something that is fruity, boozy and frankly, rather pleasant. Continue the same discard and feed cycle for another week
At this point you can either; keep the starter at room temperature and feed daily if you make multiple loaves during the week. Or, you can mix it to a thicker consistency, keep it in the fridge and feed it once a week.
To make a loaf, you first need to make something called a 'sponge.' This is a highly active, runny, yeasty goo, that kicks off the whole leavening process. To make your sponge, take 100ml of the starter. Mix with 275ml of warm water and 250g of strong bread flour–either white, wholemeal or a mixture. Cover and leave in a warm place, such as an airing cupboard or warm kitchen, overnight. In the morning it should be showing plenty signs of life and bubbling away nicely. You are now ready to make your loaf.
To make the loaf, add another 300g of strong bread flour to the sponge. You can experiment with different types of flour as you wish. Using 300g of rye flour–which has very little gluten–gives a rather dense, but moist loaf with a characteristics texture and nutty taste, whilst using white flour results in a lighter loaf, that you may be more familiar with. I also like to experiment with different proportions, such as 200g of white and 100g of rye. This is also the point at which you may wish to add other things, such as herbs, spices or charcoal, as you see fit. You can add olive oil at this stage too. The oil gives a smoother texture, but may also 'smother' the yeast and impede its activity. As a matter of personal choice I leave it out.
Add 10g of sea salt. This can be finely ground, and added at the beginning. I like to use coarse Maldon salt which I work into the bread as I am kneading it. Turn the mixture out onto a lightly floured surface and knead for approximately 10 minutes; or until you have a smooth, silky, elastic dough that stretches without breaking. Place in a lightly oiled bowl, cover with a piece of oiled cling film and leave in a warm place to prove overnight.
The next step is the second proving. Take the risen dough and, on a floured surface, knead it lightly until it has returned to its original size. This is called 'knocking back.' Next, shape the loaf; round, lozenge, baton or buns.
A standard round loaf is probably the easiest. Either you can use a special mould–made out of cane or wood fibre–called a baneton. If you don't have one, simply line a bowl with a clean tea towel that has been liberally dusted with flour, or finely ground semolina. Semolina is good, because it releases the loaf nicely and doesn't burn in the way that flour does at high temperatures, which can impart an unpleasant taste to the loaf. Cover with oiled cling film and leave to prove, for a second time.
Shortly before the second prove is complete; once the loaf has doubled in size, which usually takes about 3 hours, turn the oven on to its highest setting, 220ºC or more. Place a tray of water in the bottom of the oven. This will generate steam, which helps to produce a lovely golden crust to your finished loaf.
You can bake your loaf on a baking sheet, a clay baking stone, or a specialist artisan clay baking cloche. I have produced some of my best loaves in a cloche, which by ensuring a constant level of humidity throughout the baking process, results in the most incredible crusty bread you have ever tasted. Regardless, what is important is that, whichever method you choose you must ensure that the surface has been pre-heated for approximately 10 minutes, before turning out the shaped dough onto it. This ensures that your loaf gets, what is known in the baking terms as 'spring.' You can tell whether or not you have a achieved this, because the underside of the loaf should have 'sprung' away from the baking surface to give a beautifully rounded shape, as in the picture.
Gently turn the loaf out of the proving basket onto the hot baking surface. Using a sharp knife, or a specialist lame–a fancy name for a disposable razor blade attached to a handle–score the surface of the loaf, which will release some of the tension, and help it to rise whilst baking. Place immediately back into the hot oven, with a couple of squirts of water from a garden sprayer, to generate some more steam, and bake to 20 minutes.
Reduce the oven temperature to 200ºC, give a further squirt of water, and bake for a further 20 minutes.
The loaf should sound hollow when you tap it on the base, when it is done. Remove from the oven and place on a wire cooling rack.
Once cool, if you can wait that long, devour, fresh or toasted, in large door steps slathered with generous amounts of butter.
Notes
It takes about 2 days to make a sourdough loaf. However, the end result is truly worth it, and once you get the hang of it you won't want to eat any mass produced bread ever again. I often find the heel of the loaf, towards the end of the week, looking rather sad in the bottom off the bread bin. Whizz it up in the blender and freeze. Sourdough breadcrumbs are great for lots of things, including queen of puddings, bread sauce or a crispy crumbed coating to your pork chop.


No Comments